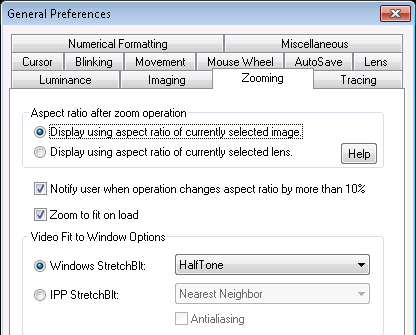
Sometimes the shapes of objects displayed on the monitor don’t seem to be an accurate representation of their actual (or expected) shapes. The perceived inaccuracy depends on how much the aspect ratio of the image file varies from the aspect ratio of the display monitor.
For most images, the option Display using aspect ratio of currently selected image results in a satisfactory representation of the objects. This is because the aspect ratio of the pixels in the image file and the aspect ratio of the pixels in the display monitor are very similar.
But if there is a significant difference between the aspect ratio of the pixels in the image file and the aspect ratio of the pixels of the display monitor, the option Display using aspect ratio of currently selected image results in an image with seemingly distorted (stretched or compacted) objects in one dimension. Apparent image distortion is most likely to occur when displaying MRI images because, while some MRI images have aspect ratios significantly different from 1.0, most display monitors have a pixel aspect ratio close to 1.0.
To resolve the apparent image distortion, use the option Display using aspect ratio of currently selected lens and define a suitable lens:
![]() All measurements reported by the program are correct regardless of the option selected (and even if the image appears distorted) .
All measurements reported by the program are correct regardless of the option selected (and even if the image appears distorted) .
Select the appropriate option for use with non-standard and oversized monitors.